
Dashbreeze logo

Using Metrics in Dashboards

Using Metrics in Dashboards - Add a saved metric to a KPI or Gauge block and reuse the same calculation across dashboards.

Add a saved metric to a KPI or Gauge block and reuse the same calculation across dashboards.

Once a metric is saved, it's ready to plug into a KPI or Gauge block — on any dashboard in the workspace. Connect it wherever you need that number instead of rebuilding the calculation each time.
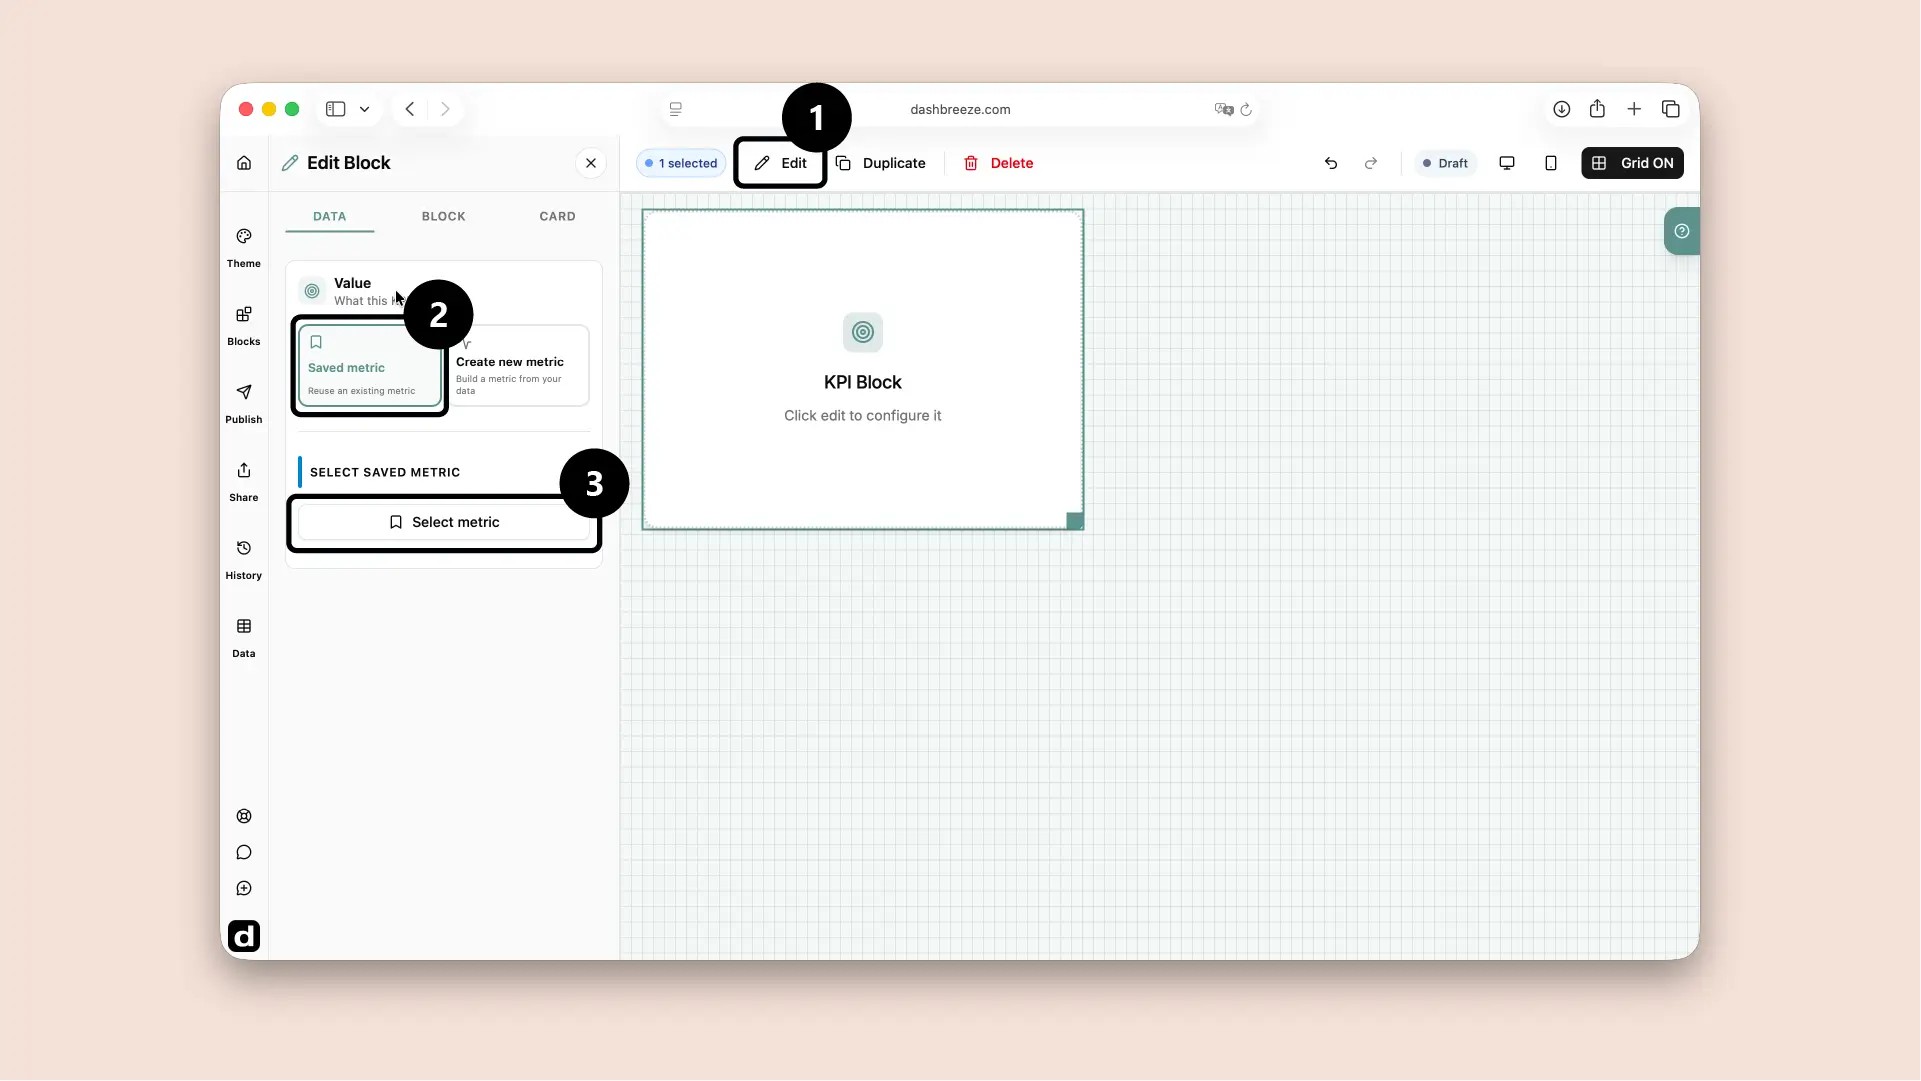
Connect a metric to a block

  1. Add a KPI or Gauge block to your dashboard — or select one that's already there.
  2. Open its Data settings and find the Value option.
  3. Select Saved metric, search for the one you want, and choose it from the list.
    A KPI block's Data settings with Saved metric selected and the Select metric button highlighted.

Saved metric

Choose a metric that already exists in your workspace — the block reuses its formula and number format, so it always matches what's on the Metrics page.

Create new metric

Build a new metric without leaving the dashboard — pick a table, column, and calculation mode and it stays private to that block. Open the builder from there instead, and you can save it to your workspace so it also appears on the Metrics page.

Manual Value

Type a fixed number yourself — use this for a target or reference value that doesn't come from your data, like a goal of 100. It belongs only to that block and never appears on the Metrics page.

One metric, many blocks

Connect a single metric to as many blocks as you like, across any dashboard in the workspace. The calculation stays consistent everywhere it's shown — if two dashboards both need Customer Churn, connect both KPI blocks to the same saved metric instead of building it twice.

Up Next