
Dashbreeze logo

Managing Workspaces

Managing Workspaces - Create, rename, and customize your workspaces.

Create, rename, and customize your workspaces.

This article covers creating a new workspace, customizing an existing one, and managing its members.

Workspace settings require Owner or Admin:Members can't open workspace Settings at all. Inside Settings, Owners and Admins can both rename the workspace, invite or remove members, and change member roles. Only the Owner can manage the subscription, delete the workspace, or transfer ownership.
Creating a workspace

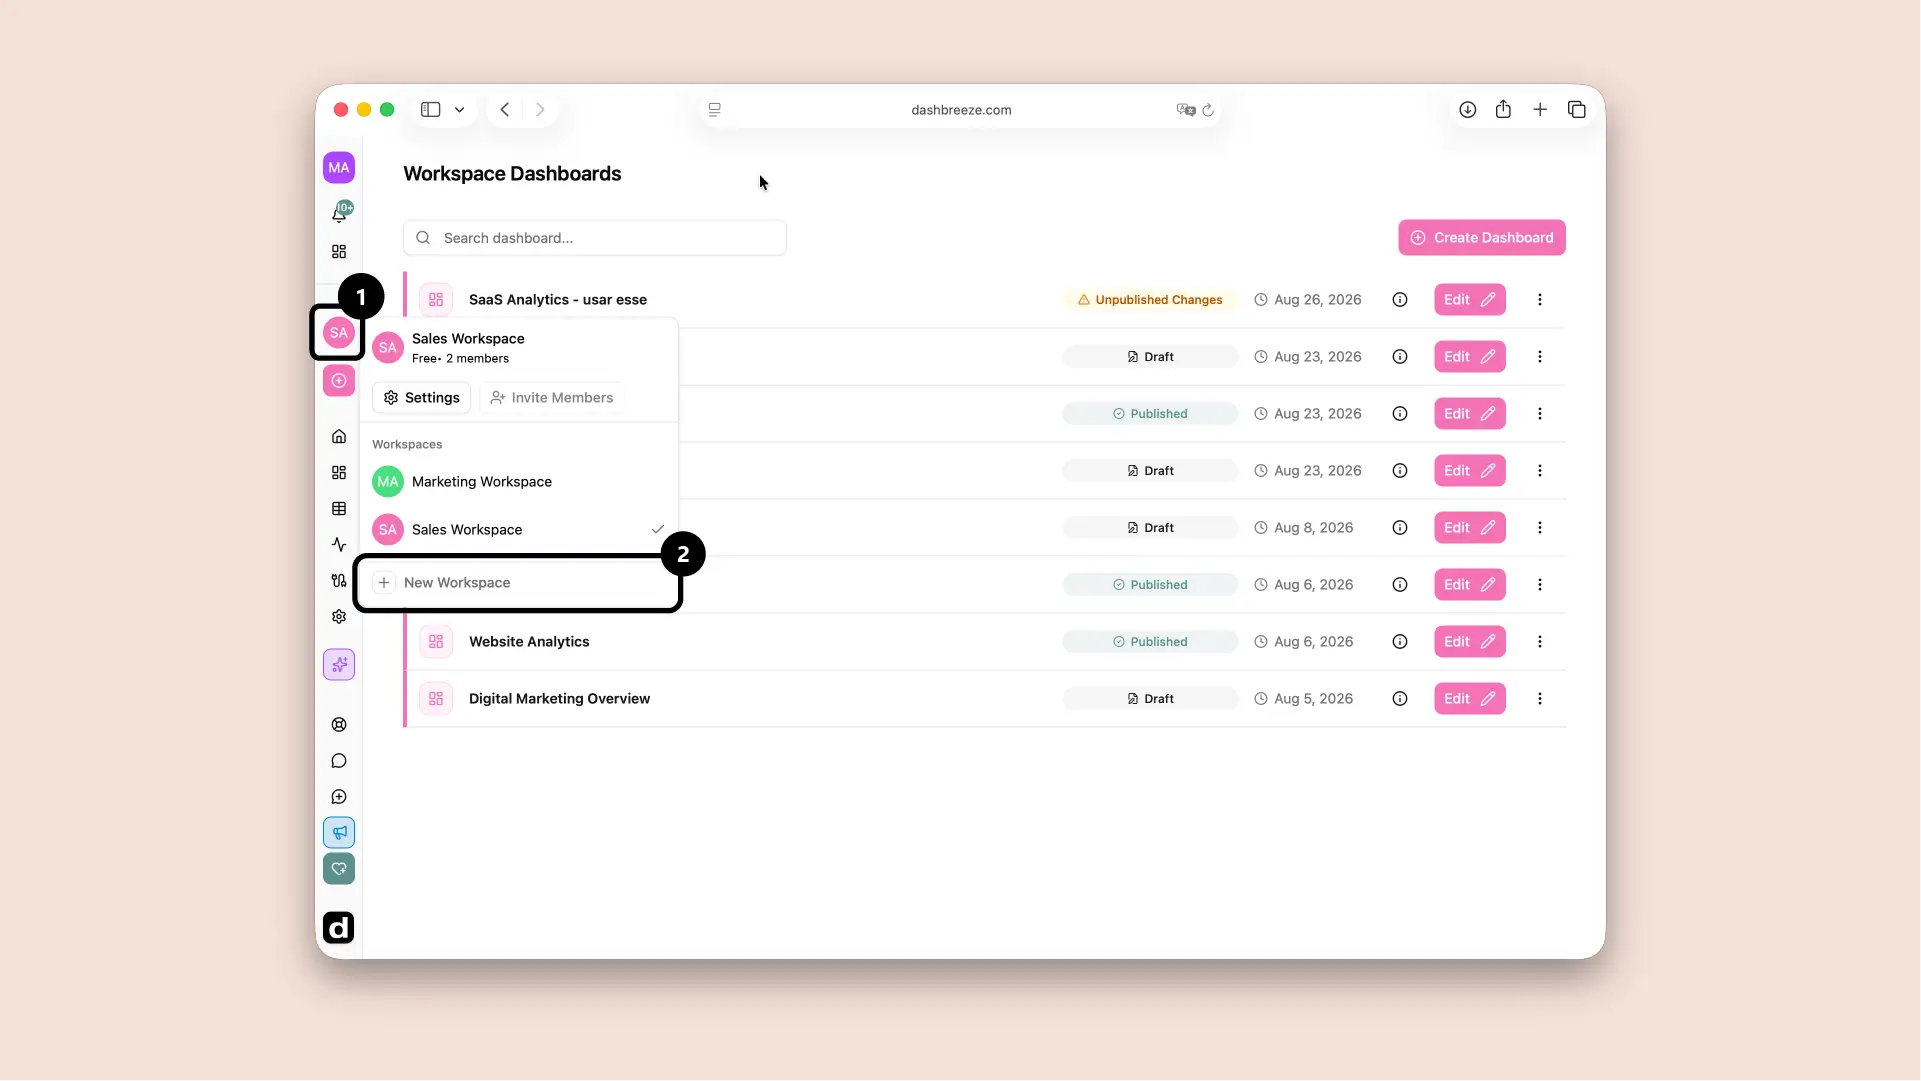
  1. Open the workspace selector in the left sidebar and click New Workspace.
    Workspace selector with New Workspace highlighted
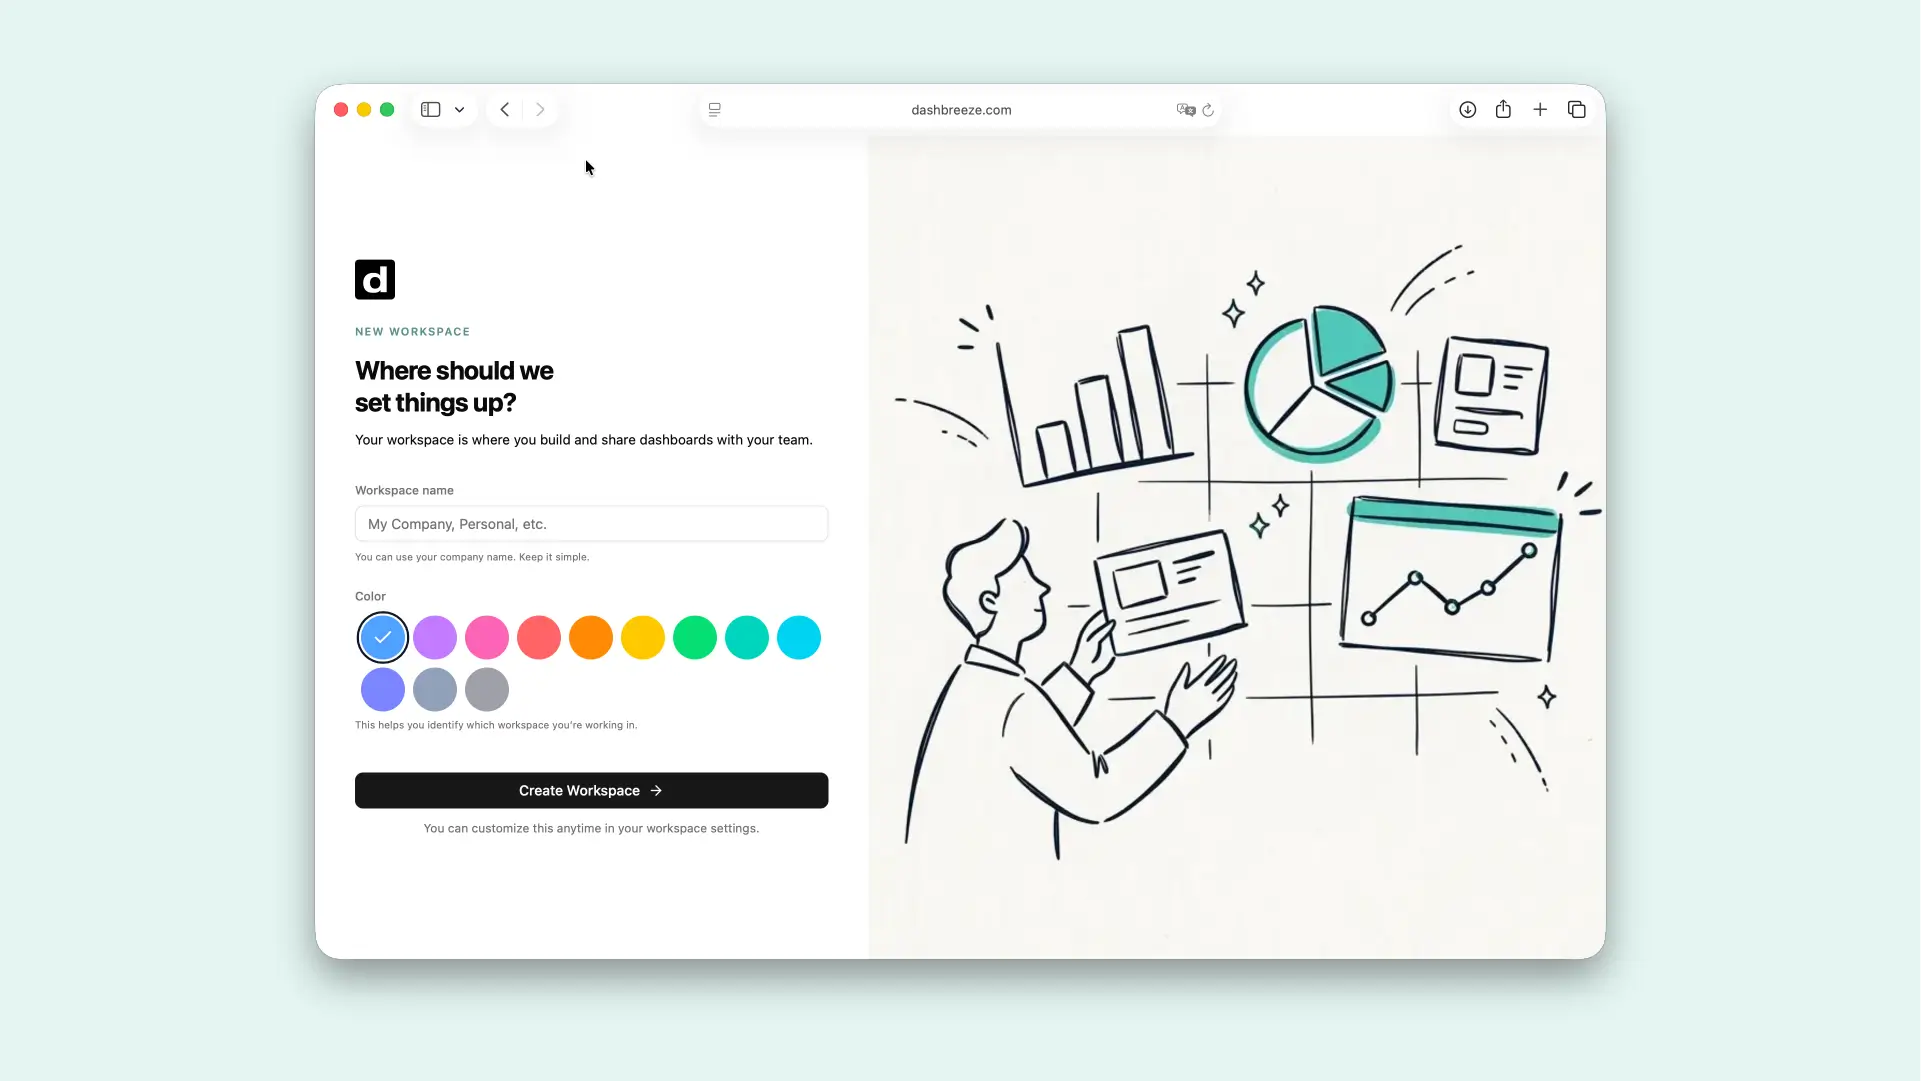
  2. Enter a name and pick a color for the workspace.
    New workspace form with name and color fields
  3. Click Create.

You're automatically made the Owner of any workspace you create, and can invite teammates to it right away or skip that step for later.
Renaming and customizing a workspace

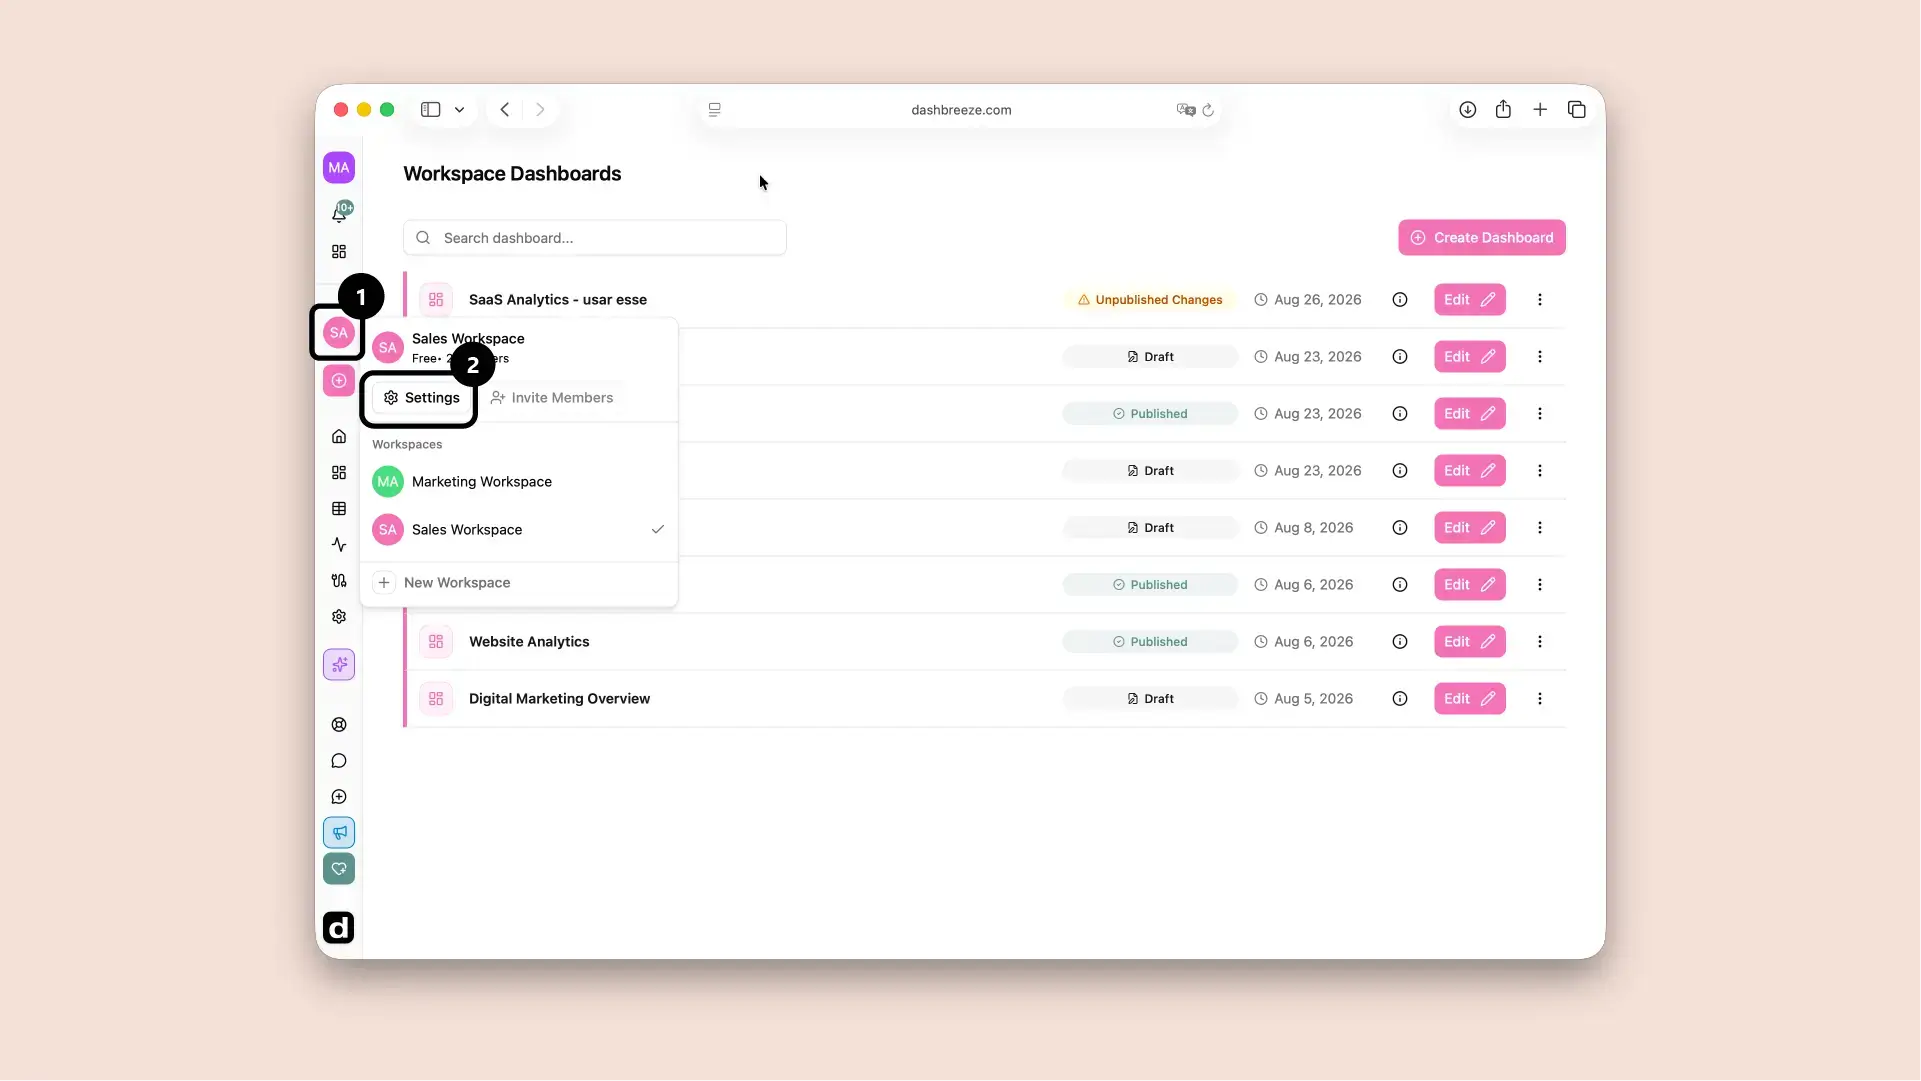
  1. Open the workspace selector and select Settings.
    Workspace selector open in the left sidebar with Settings highlighted.
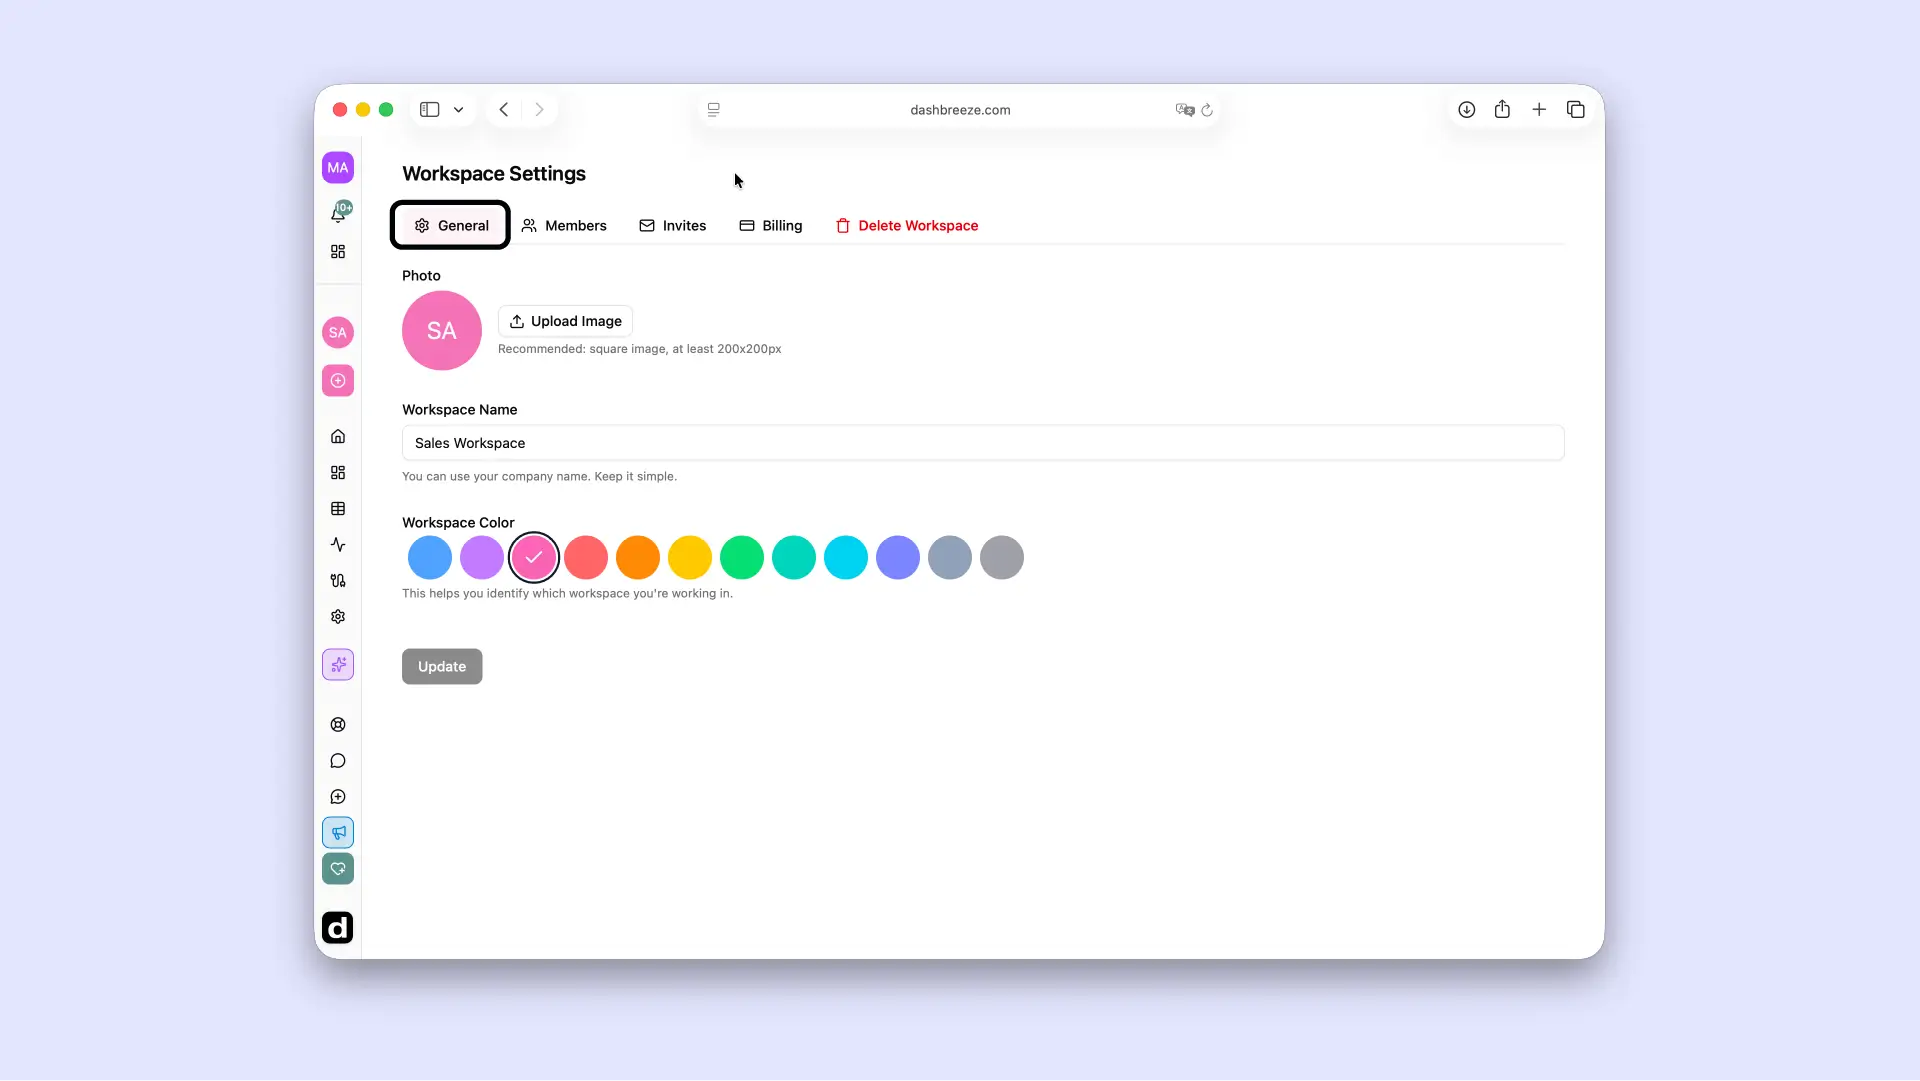
  2. On the General tab, update the workspace's name, logo, or color.
    Workspace Settings General tab showing Photo, Workspace Name, and Workspace Color fields.
  3. Save your changes.

Changing a member's role

  1. Open the workspace selector and select Settings.
    Workspace selector open in the left sidebar with Settings highlighted.
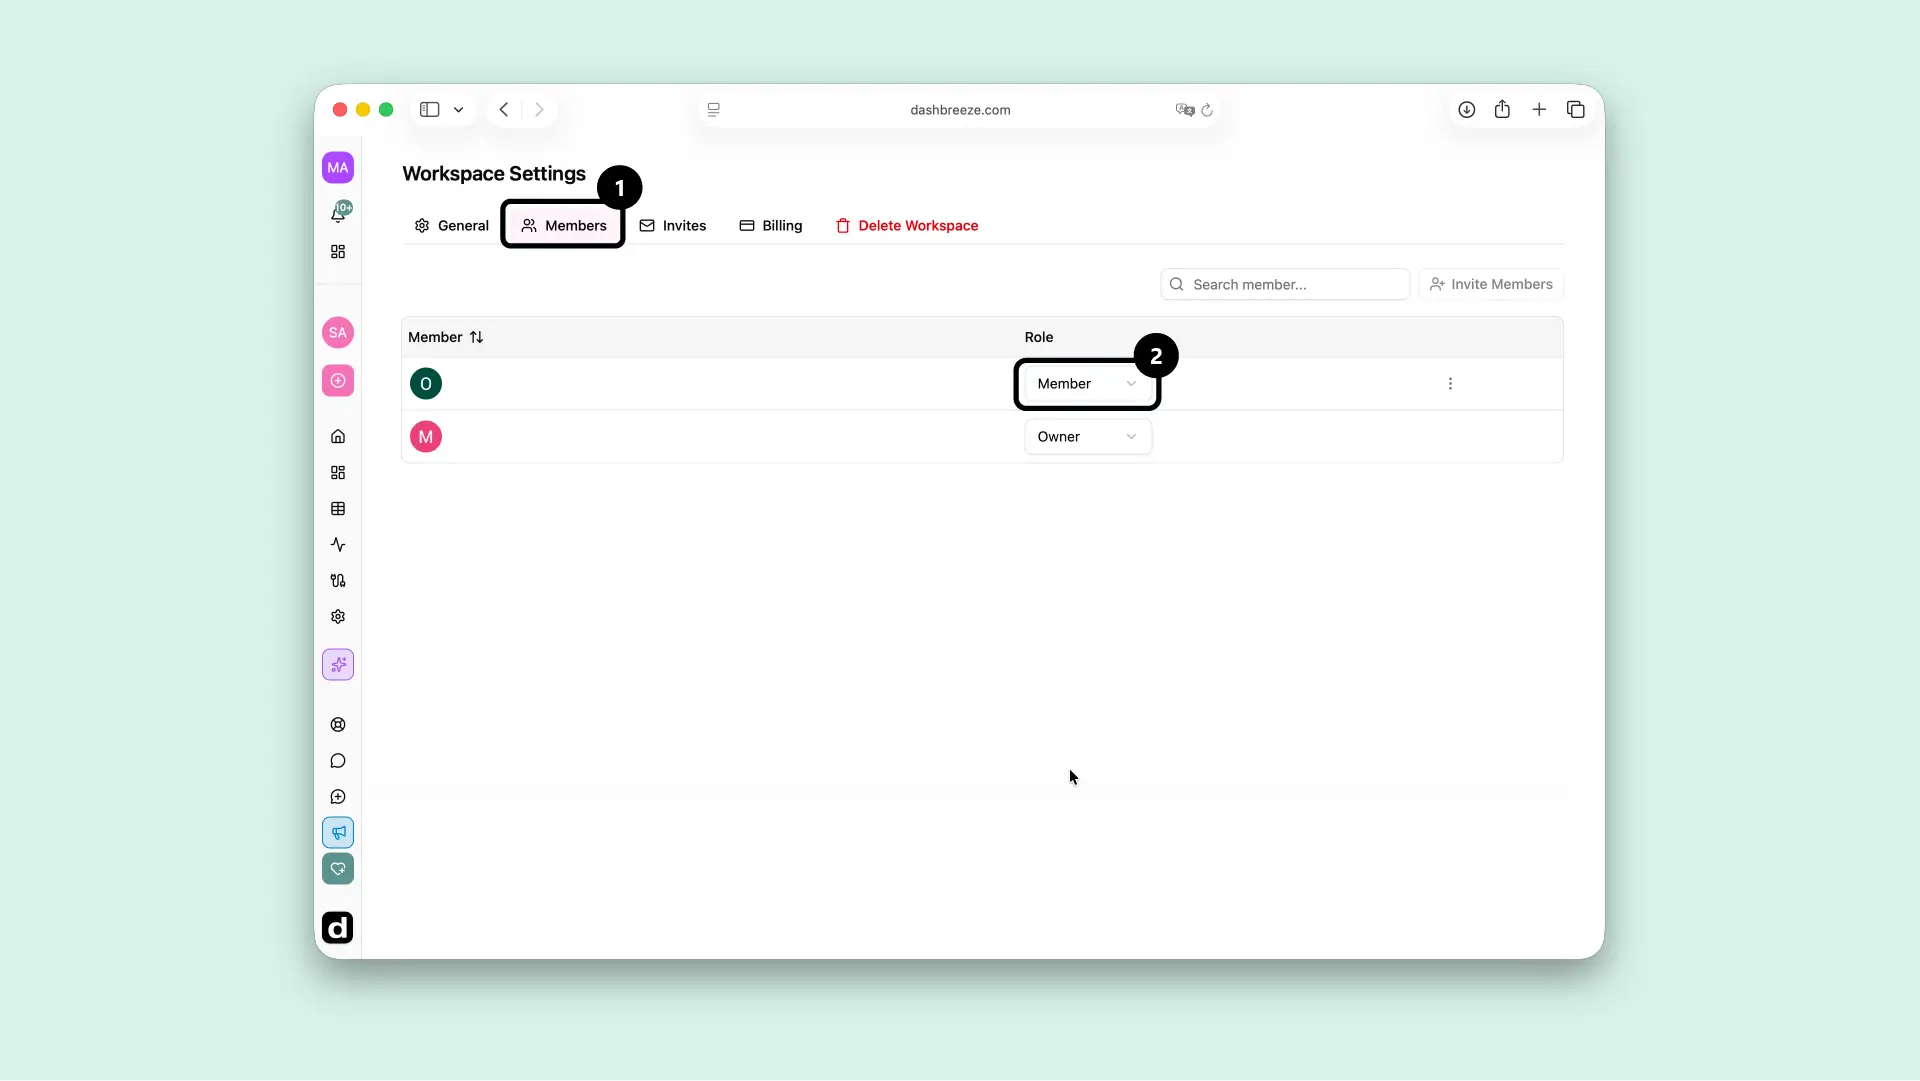
  2. Go to the Members tab and find the member you want to update.
  3. Choose their new role from the dropdown next to their name. The new permissions take effect immediately.
    Workspace Settings Members tab with a member's role dropdown open, showing Member and Owner options.

Only Owners and Admins can change roles:Admins can move a member between Admin and Member, but they can't assign the Owner role or change the current Owner's role. Only the Owner can transfer ownership.
Removing a member

  1. Open the workspace selector and select Settings.
    Workspace selector open in the left sidebar with Settings highlighted.
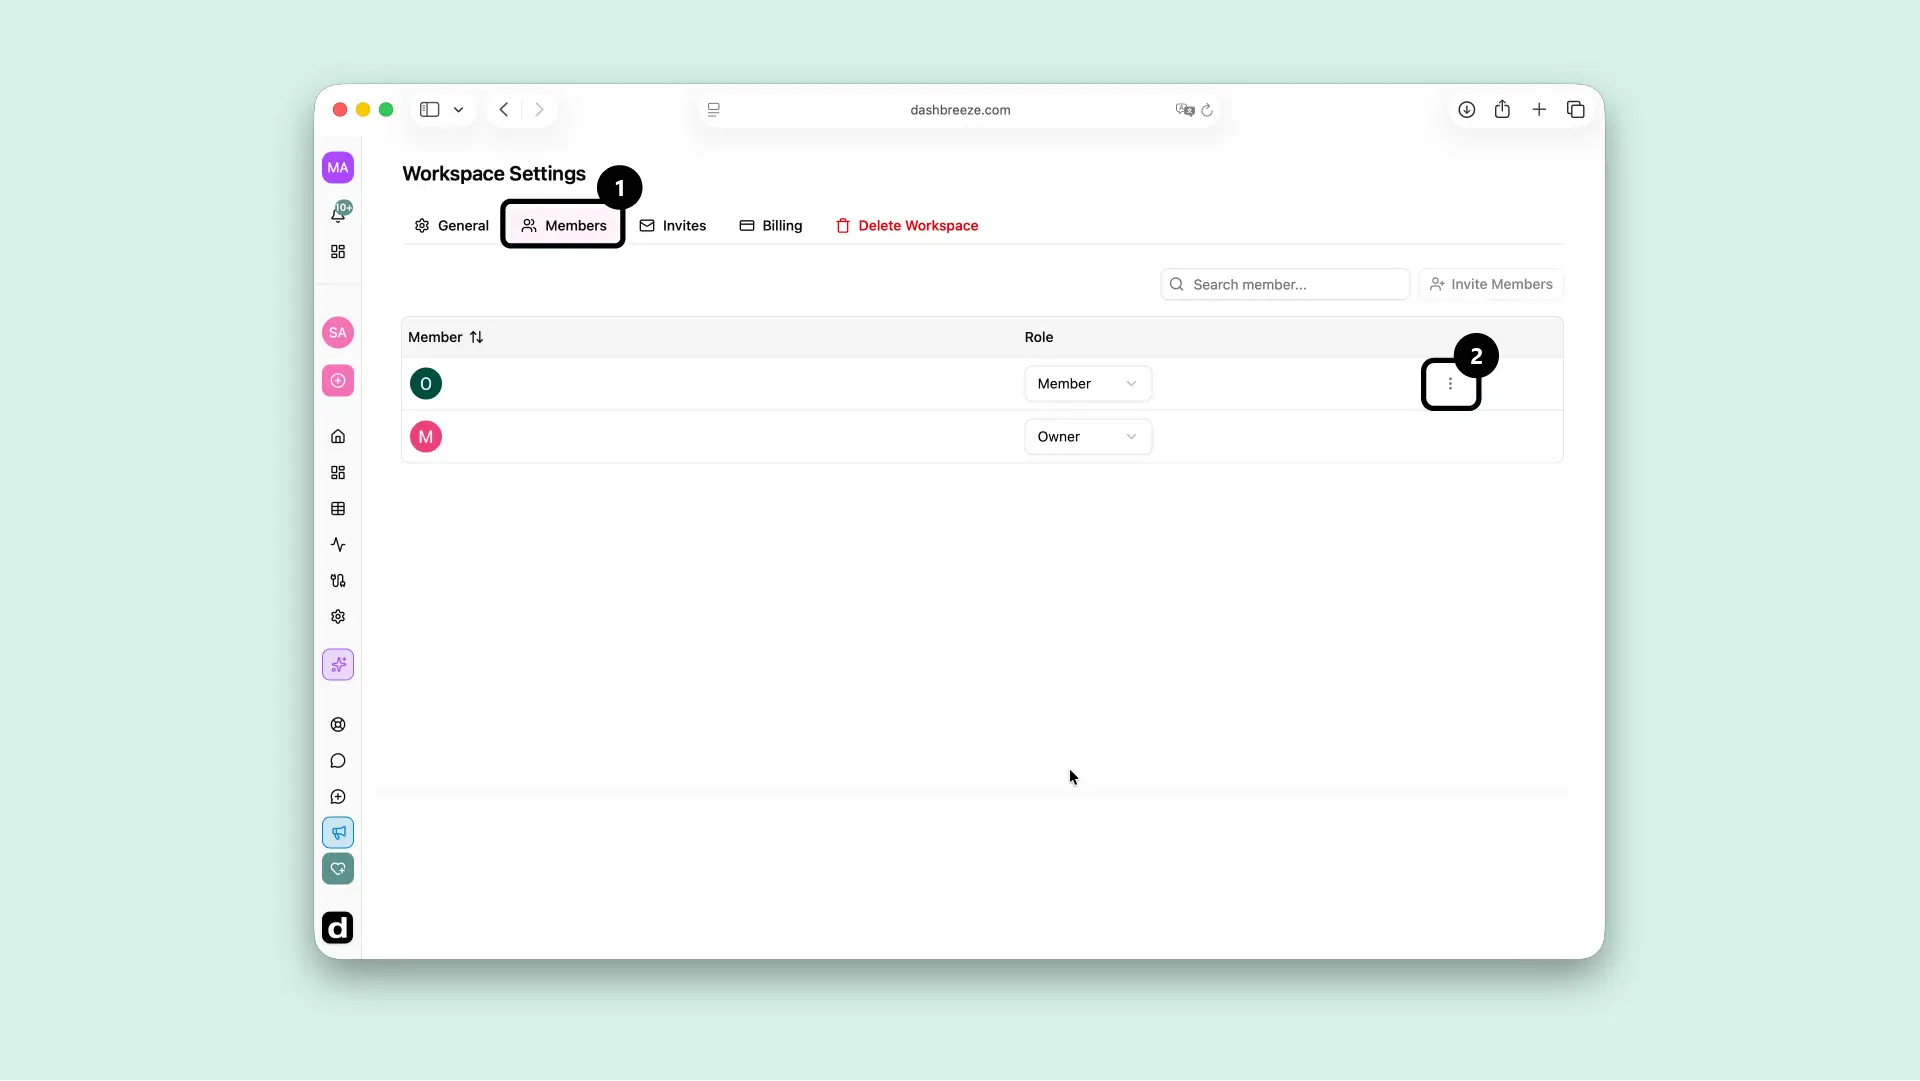
  2. Go to the Members tab and find the member you want to remove.
  3. Open their row menu and choose Remove Member, then confirm.
    Workspace Settings Members tab with a member row's menu button highlighted.

Removing a member immediately revokes their access to the workspace's dashboards, tables, and data sources.

Up Next